Installing a garage door automatic opener can significantly enhance your home's convenience, security, and value. Whether you happen to be a DIY enthusiast eager to tackle the project yourself or a homeowner seeking detailed insight before hiring a professional installer, this guide offers everything you need to know about garage door automatic opener installation. From understanding essential components to safety tips, troubleshooting common problems, and exploring smart upgrades, we cover all critical aspects to help you make an informed decision and complete the installation successfully.
Understanding Garage Door Automatic Opener Installation
At its core, garage door automatic opener installation means fitting an electric motorized system that operates the garage door remotely or through wall controls instead of manual lifting. The electric motor garage door opener brings effortless access along with three secondary benefits — stronger security, better safety features, and the daily convenience that comes with not lifting a door by hand. Automatic doors also improve home insulation and reduce operating noise compared to traditional manual doors.
Installing one involves several parts working together, including the motor unit, control systems, sensors, and remote transmitters. Understanding the installation process helps homeowners decide whether to engage professional installers or pursue a DIY route safely and confidently.
The Components Behind a Garage Door Automatic Opener
Knowing the main components of a garage door automatic opener system matters before you begin any install work. Each component plays a specific role in the system.
- Motor Unit: Houses the electric motor and control board — this is the opener's central component.
- Drive Mechanism: Available as drive chain, belt drive, or screw drive — each option moves the door along the rail system.
- Control Board and Opener Gears: Manage the door's movement and limit switch settings.
- Remote Control, Wireless Receiver, and Transmitter: Provide the wireless operation that makes remote-controlled access possible.
- Wall Button and Keypad Entry: Allow manual activation inside the garage or entry via a security code outside.
- Safety Beam and Infrared Sensors: Prevent accidents through obstruction detection during door movement.
- Battery Backup and Power Supply: Maintain uninterrupted door operation when grid power fails.
- LED Light: Illuminates the garage area when the door operates, improving visibility and security.
Getting Prepared for the Install
Preparation done well makes the difference between a smooth garage door automatic opener installation and one that hits problems mid-job. Begin with inspection — the garage door panel, frame, and threshold all need checking for damage or misalignment that could affect performance. Door balance needs verification, and the torsion or extension springs need to be confirmed as functioning safely before any opener work begins.
Hardware preparation matters as much as door preparation. The mounting hardware list runs to brackets, rails, door arms, copyright Gold Coast door maintenance services pins, and track rollers — all needed to secure the operator head and rail system properly. Weather seals and additional insulation work well as add-ons during this stage too, delivering energy efficiency and noise reduction benefits that compound with the opener's value.
The Installation Tool Inventory
- Installation kit provided with the opener, including mounting hardware and manual release tools.
- Standard toolkit including a cordless drill, socket wrench set, screwdriver, pliers, tape measure, and level.
- Safety equipment too — ladder, protective eyewear, and gloves.
- Recognize that professional installers sometimes use specialized equipment that DIY toolkits won't include — some heavy-duty installations genuinely need it.
Step-by-Step Garage Door Opener Installation Walkthrough
Follow these steps carefully to install your garage door automatic opener correctly:
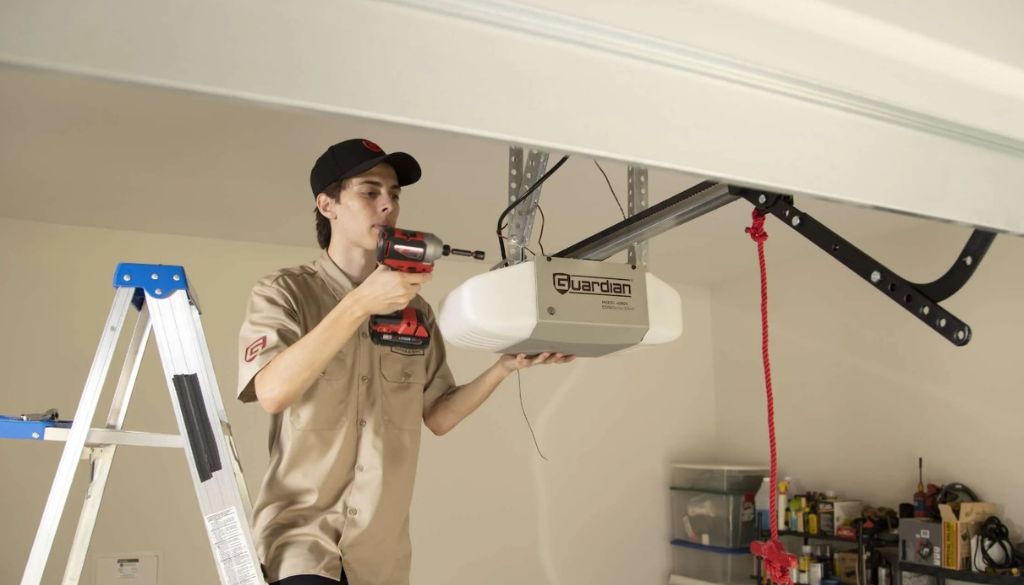
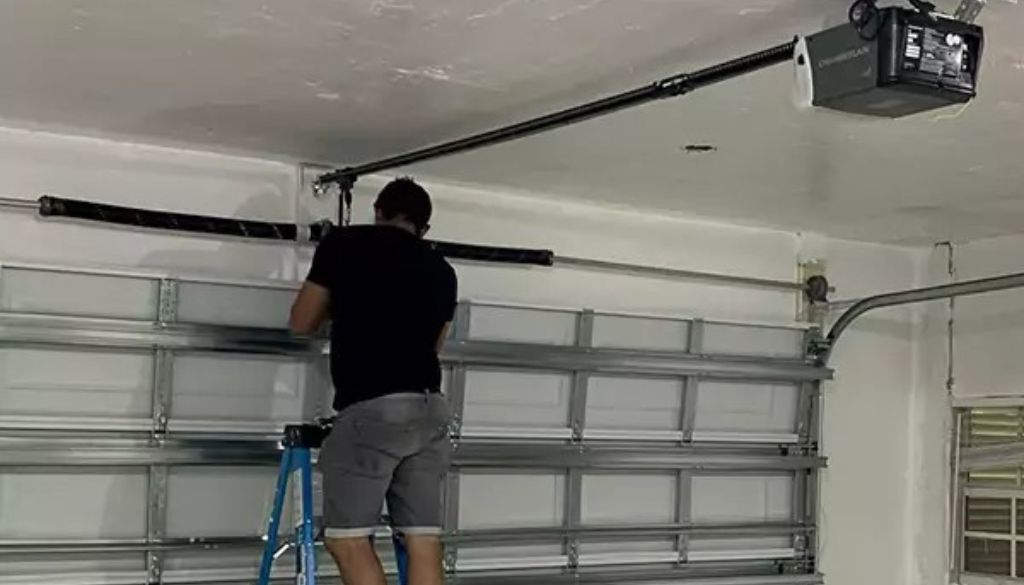
- Position the Motor Unit and Rail System: Connect the rail to the motor unit, then extend it toward the door while aligning to the door's centre.
- Attach Mounting Bracket and Operator Head: Mount the bracket on the garage ceiling and join the operator head to the door arm.
- Connect Drive Chain, Belt, or Screw Drive: Choose your drive type and install it according to manufacturer instructions, adjusting tension properly.
- Wire Wall Button and Keypad Entry: Route wiring from the motor unit to the wall-mounted controls — secure connections and good placement both matter.
- Set Limit Switch and Adjust Opener Gears: Set the door's open and close limits properly — the motor needs to stop at the correct positions for safe operation.
- Install Sensors and Safety Beam: Mount the infrared sensor beams on either side of the doorframe to prevent closing on obstacles.
- Connect Battery Backup and Power Supply: Plug in the power supply and install the battery backup unit to maintain operation during outages.
- Program Remote Control and Wireless Keypad: Sync the remote transmitters and keypad codes to the motor unit using the opener's programming procedure.
Safety Protocols During Installation
Garage door automatic opener installation requires particular attention to safety protocols:
- Always verify sensor safety by testing the infrared beams to stop door closure when obstructed.
- Ensure door balance and spring tension happen to be correctly adjusted before installation to avoid door dropping unexpectedly.
- Know the manual release mechanism — disengaging the opener in an emergency relies on you knowing how it works.
- Add alarm system integration and security locks where appropriate to strengthen protection against unauthorized entry.
- Wear appropriate personal protective equipment and avoid working under a partially installed door.
Troubleshooting Common Installation Issues
Issues happen even on careful installations — common problems and solutions follow.
- Remote Battery Problems: When remotes don't activate the opener, replace the batteries.
- Transmitter or Wireless Receiver Malfunctions: Reprogram devices or check wiring if signals don't reach the motor unit.
- Misaligned Sensors: Realign the safety beam sensors so they face each other directly without anything blocking the beam.
- Noisy Operation: Apply lubricant to moving parts and inspect mounting hardware for looseness that could cause vibration.
- Door Not Closing Properly: Limit switch reset combined with verification of door balance and spring tension solves most closing problems.
- Drive Chain Slipping or Belt Noise: Adjust chain tension or replace worn belts to reduce noise and improve function.
- Control Board Malfunctions: Look for moisture damage, corrosion, or wiring damage, then consult the manufacturer's manual for reset procedures.
Advantages of Hiring a Professional Installer
While DIY installation tends to be feasible, engaging a professional installer brings multiple advantages:
- Correct Installation: Professionals ensure the opener happens to be mounted securely and wired according to safety standards.
- Safety Compliance: Spring, cable, and electrical work all carry real risk that trained experts know how to handle.
- Warranty Protection: Product warranties typically remain intact when a professional installer performs the work.
- Expert Troubleshooting: Experts resolve complex issues fast, preventing the time loss and additional damage that drags out DIY troubleshooting.
- Peace of Mind: Doing the job correctly the first time delivers peace of mind that DIY rarely matches.
Post-Installation Maintenance for Your Opener
Maintenance extends the opener's lifespan and keeps safety features working properly.
- Schedule regular inspections of springs, cables, and rollers so wear gets caught before it becomes a problem.
- Change the remote batteries on a regular schedule and clean the keypad covers to protect the electronics underneath.
- Lubricate moving parts like copyrights, tracks, and drive mechanisms to reduce friction and noise.
- Weather seals and door insulation both need cleaning and inspection to keep the door's energy efficiency intact.
Going Smart: Garage Door Opener Upgrades
Modern smart garage door openers offer enhanced functionality beyond standard models:
- Smart Garage Integration: Home automation integration brings remote control through smartphone apps right to the opener.
- App Control and Notifications: Get alerts on every door cycle and control the door securely from anywhere.
- Advanced Motion Detectors and Sensors: Real-time monitoring and automatic lighting both improve security on smart-enabled openers.
- Wireless Connectivity: Wi-Fi or Bluetooth compatibility means updates and feature additions install easily over time.
- Added Security Features: Two-factor authentication, encrypted communication, and temporary access codes enhance protection.
Common Questions About Garage Door Automatic Opener Installation
- How long does it take to install a garage door automatic opener?
Most installations run 2 to 4 hours — door type, opener model, and installer experience drive the variation. - Is DIY installation of an automatic garage door opener safe?
Safe DIY installation works when proper tools, knowledge, and safety guidelines come together, but spring adjustments and challenging setups still call for professional handling. - What tend to be the most common problems after installation?
The frequent problems include misaligned sensors, remote control malfunctions, noisy operation, and incorrect door limits. - What determines whether my garage door fits an automatic opener?
Sectional and tilt-up doors are generally compatible, but verify door weight, size, and spring type before picking an opener model. - What safety items should I verify once installation finishes?
Confirm the infrared safety beams work, the manual release functions, mounting is secure, and door balance is adequate. - Is battery backup essential for an automatic garage door opener?
Highly recommended — battery backup keeps the opener working through power outages and delivers genuine peace of mind. - How often should I service or maintain my garage door opener?
Twice-yearly maintenance checks and annual lubrication of moving parts cover the recommended service schedule.
In conclusion, garage door automatic opener installation happens to be a valuable upgrade for any homeowner seeking convenience, safety, and modern features. By understanding essential components, preparing thoroughly, following detailed installation steps, and adhering to safety tips, you can achieve a successful setup—whether you choose the DIY route or professional assistance. Regular maintenance and potential smart upgrades will keep your system running smoothly for years to come. Ready to enhance your garage access? Start planning your installation today or consult a professional to get started!